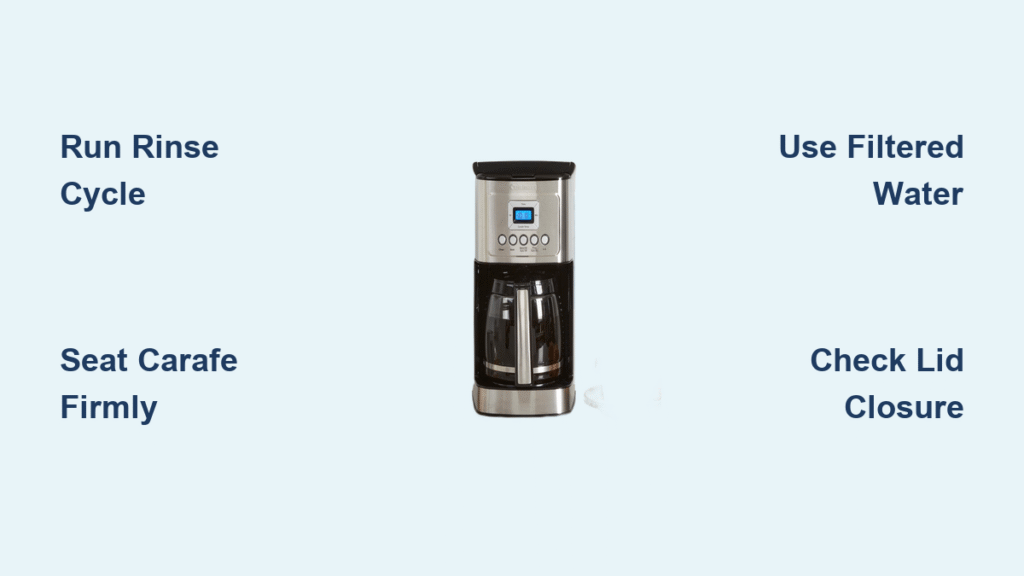
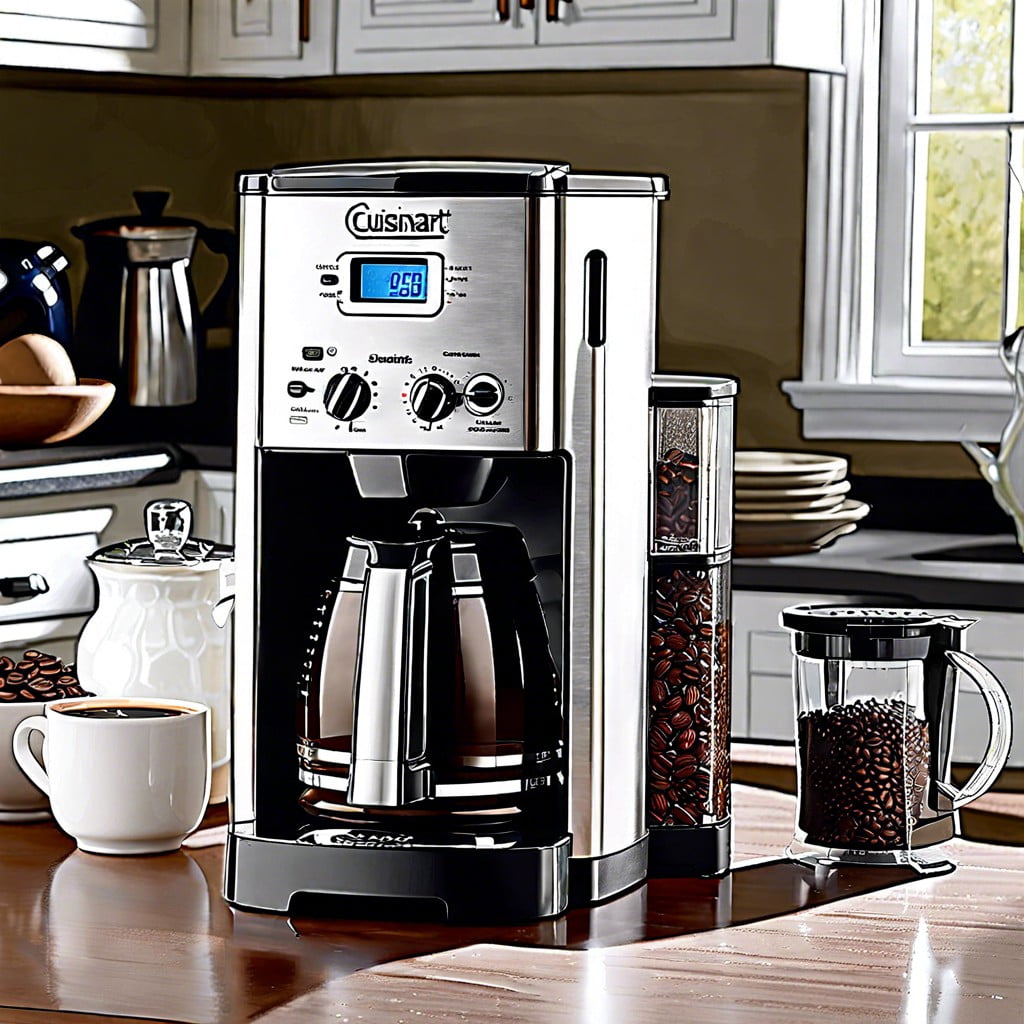
To start a Cuisinart coffee maker, fill the water tank, add ground coffee to the filter basket, place the carafe correctly, plug in the machine, and press the Brew or On button.
In American homes, coffee is often the first thing people reach for before work, school, or a long drive. A Cuisinart coffee maker can make that morning routine simple, whether you are brewing a full pot for the family or just a few cups for yourself. However, the first setup can feel confusing if you have never used one before.
The good news is that most Cuisinart drip coffee makers follow a simple process. You add water, prepare the filter basket, place the carafe, and start the brewing cycle. If your machine is new, you should also run a water-only cleaning cycle before making your first pot. Button names and control settings can vary by model, so this guide explains the common steps and highlights important differences.
What You Need Before Starting a Cuisinart Coffee Maker
Before turning on your coffee maker, gather the basic items you need. A little preparation helps prevent spills, incorrect setup, and delays during your first brew.
Most Cuisinart drip machines need fresh water, ground coffee, a compatible filter, and a carafe. Some models also include a charcoal water filter that sits inside the water reservoir. Check your machine’s manual to see which accessories came with your model.
Place the machine on a flat, dry countertop near a suitable electrical outlet. Keep it away from the edge of the counter and leave enough room to open the lid and fill the reservoir.
Source: purecoffeejoy.com
Fresh water
Use clean, cold drinking water. Avoid filling the tank with hot water unless your specific manual allows it.
Ground coffee
Choose ground coffee suitable for drip brewing. A medium grind is a practical starting point for most standard drip models.
Coffee filter
Use the correct basket-shaped paper filter or the permanent filter supplied for your machine.
Carafe
Use the matching glass or thermal carafe designed for your coffee maker. Make sure it is clean and undamaged.
Electrical outlet
Use a suitable household outlet that matches the electrical requirements printed on your machine.
Find Your Cuisinart Model Number
Cuisinart makes several types of coffee makers. These include basic drip machines, programmable brewers, grind-and-brew models, and coffee center machines with single-serve options.
Look for the model number on the bottom or back of the machine. You may also find it on the original box or product paperwork. A model number such as DCC-3200, DCC-2800, or SS-15 can help you find the correct instructions.
This matters because one model may use a single Brew button, while another may require you to turn a function knob to BREW before pressing a separate button.
May include a digital clock, Auto On setting, brew strength selection, and a delayed start feature.
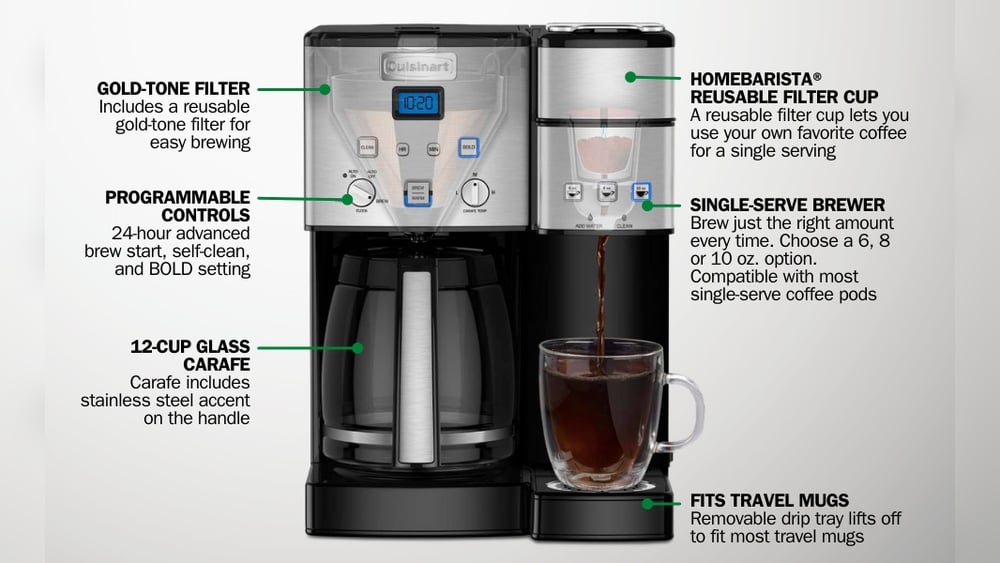
Coffee Center model
May have separate controls for the carafe brewer and single-serve brewing side.
How to Set Up a New Cuisinart Coffee Maker
A new Cuisinart coffeemaker needs a little preparation before its first pot. Remove the packaging, wash the removable parts, and flush the internal brewing system with water.
This first cleaning cycle helps remove loose dust and residue that may remain from manufacturing, packing, or storage. Do not add coffee grounds during this cycle.
Unplug the machine before washing or handling removable parts. Never place the main unit, electrical cord, or plug in water.
Source: fixmeasnack.com
Step 1: Remove the packaging
Take off plastic wrap, cardboard, tape, protective inserts, and other packing materials. Check the filter basket and carafe for loose packaging.
Step 2: Wash removable parts
Wash the carafe, lid, filter basket, and other washable accessories with warm water and mild dish soap. Rinse them well.
Step 3: Prepare the charcoal filter
If your model includes a charcoal water filter, prepare and install it according to the manual. Some models require soaking the filter before installation.
Step 4: Fill the reservoir
Add fresh, cold water to the reservoir. Follow the marked water levels and avoid filling beyond the maximum line.
Step 5: Position the carafe
Place the empty carafe on the warming plate or in its designated position. Make sure it sits flat.
Step 6: Connect the machine
Once the water reservoir is filled, plug the machine into a suitable household outlet. Follow the connection instructions in your model’s manual.
How to Install the Charcoal Water Filter
Some Cuisinart coffee makers include a charcoal water filter to help reduce chlorine taste, odors, and certain impurities in the water. It is usually placed inside a small holder in the reservoir.
Remove the filter from its packaging and prepare it as directed in the instruction booklet. If soaking is required, use clean, cold water for the stated time. Rinse or flush it as directed before placing it in the holder.
Make sure the holder closes properly and sits securely in its slot. A filter that is not fitted correctly may move during use or fail to work as intended.
Not every Cuisinart model uses the same filter. Check the replacement type and service interval in your manual rather than assuming all charcoal filters fit every machine.
Check the fit
The filter should sit firmly inside its holder without being forced.
Follow preparation instructions
Soaking and rinsing requirements vary by model and filter type.
Replace it when needed
Use the replacement schedule stated in your manual. Some Cuisinart models recommend replacement after about 60 days or 60 uses.
Run the First Water-Only Cleaning Cycle
Before making coffee, run one complete brewing cycle with water but no coffee grounds. This is a basic first-use step in several Cuisinart drip coffee maker manuals.
Fill the reservoir with fresh water, leave the filter basket empty, and put the carafe in place. Start a normal brew cycle using the control sequence listed for your model.
Wait until the cycle finishes. Let the hot water cool before handling the carafe, then pour it away. If your model has separate carafe and single-serve brewing systems, check whether both sides need their own initial cleaning cycle.
Do not add coffee
The first cycle is for flushing the machine, not making a drink.
Keep the carafe in place
The carafe must be correctly positioned to collect the hot water.
Discard the water
Do not drink the water from the initial cleaning cycle.
How to Start Cuisinart Coffee Maker Step by Step
Once the first cleaning cycle is complete, you can make your first pot of coffee. The usual process is simple: add water, prepare the filter, add coffee, position the carafe, and start the brew cycle.
The following instructions apply to many Cuisinart automatic drip coffee makers. If your model has a different control panel, use the matching instructions in its manual.
Source: img.ennect.com
Step 1: Fill the water reservoir
Open the reservoir lid and pour in fresh, cold water. Use the cup markings to measure the amount you want to brew.
Step 2: Open the filter basket
Pull out or open the filter basket. Check that it is clean and fully seated.
Step 3: Add the coffee filter
Place a compatible paper filter or permanent filter inside the basket. Make sure it sits flat.
Step 4: Add ground coffee
Measure your coffee and spread the grounds evenly inside the filter. Do not fill the basket beyond its recommended capacity.
Step 5: Close the filter basket
Return the basket to its normal position and make sure the lid closes properly.
Step 6: Position the carafe
Place the empty carafe directly under the coffee outlet. Make sure it sits correctly on the warming plate or in the carafe holder.
Step 7: Plug in the machine
Connect the coffee maker to a suitable outlet if it is not already plugged in. Check that the display or power indicator responds.
Step 8: Select your brewing settings
Choose a brew strength or small-batch option if your machine has these features. Basic models may not offer these settings.
Step 9: Press the Brew or On button
Select the immediate brewing function. On some models, turn the function knob to BREW first and then press the Brew or On button.
How to Know the Coffee Maker Has Started
After you press the correct button, the display or indicator light may change. Depending on the model, you may hear a sound or see a brewing status indicator.
Water should begin moving through the machine and into the filter basket. After a short time, brewed coffee should start collecting in the carafe.
The full brewing time depends on the machine, water amount, and selected settings. Avoid opening the filter basket or removing the carafe during normal operation unless the manual specifically permits it.
Power indicator
The power or brewing light should show that the machine is operating.
Water movement
The machine should begin heating and moving water through the brewing system.
Coffee collection
Coffee should flow into the carafe through the filter basket.
End-of-cycle signal
Some models beep when brewing is complete. Others use an indicator light or display.
What to Do After Brewing Finishes
When the brewing cycle ends, give the coffee a moment to finish dripping. Some coffee makers release a small amount of coffee from the filter basket even after the main cycle stops.
Carefully remove the carafe using its handle. Pour the coffee into your cup without touching the hot glass or the warming plate.
If your model has a warming plate, check its Auto Off setting. Some machines turn the plate off automatically after a set time, while others offer adjustable settings.
Handle hot parts carefully
Use the carafe handle and keep your hands away from steam and hot surfaces.
Turn off the machine when needed
Follow your model’s instructions for switching off the brewer and warming plate.
Remove used grounds
Allow the filter basket to cool before removing the used coffee and cleaning it.
How to Start Different Cuisinart Coffee Maker Models
Not every Cuisinart coffee maker starts in exactly the same way. Some have one simple power button, while others use a function knob, digital display, or separate controls for different brewing systems.
Knowing which type you own can save time. The following examples explain common control layouts without suggesting that every model uses identical buttons.
Source: i.ytimg.com
Basic models
Look for a Brew, On, or On/Off button. Fill the reservoir, prepare the filter basket, and press the correct control.
Programmable models
Set the clock if you want to use automatic brewing. For immediate brewing, select the normal Brew function rather than relying on the delayed-start timer.
Models with function knobs
Turn the knob to the required setting, such as BREW, before pressing the separate Brew or Power button.
Single-serve models
Fill the water tank, prepare the capsule or reusable filter cup, place a suitable mug underneath, and select the brew size or start control.
Starting a Cuisinart DCC-Style Coffee Maker
Many DCC-series coffee makers are automatic drip machines. Their control panels may include a digital clock, Brew button, programming controls, and options for brew strength or smaller batches.
For immediate brewing, fill the reservoir, add coffee to the filter basket, and place the carafe on the warming plate. Press the Brew or On/Off control as described in the manual.
Some DCC models use a function knob. On these machines, you may need to select BREW before pressing the separate power or Brew button. Do not assume the clock must be set before every manual brew.
Immediate brewing
Use the normal Brew setting and its matching start control.
Delayed brewing
Set the clock and Auto On time if you want the machine to begin later.
Starting a Cuisinart Coffee Center
Coffee Center machines may combine a full carafe brewer with a single-serve brewer. These systems can have separate reservoirs, buttons, and preparation steps.
First, identify which side you want to use. For the carafe side, follow the normal filter basket and carafe instructions. For the single-serve side, prepare the capsule holder or reusable filter cup and place a mug under the outlet.
Do not press controls for one brewing side when you intend to use the other. Check the display and labels before starting.
Carafe side
Use the carafe reservoir, ground coffee, filter basket, and matching Brew control.
Single-serve side
Use the correct capsule or reusable filter cup and the single-serve brewing controls.
First-use cleaning
Check whether each brewing system requires a separate water-only cleaning cycle.
Starting a Cuisinart Coffee Maker With a Simple On Button
Some basic Cuisinart models have a simple On/Off control. Once you have filled the reservoir, added coffee, and positioned the carafe, press the button to start brewing.
If the button does not respond, check that the machine is connected to power and that the removable parts are fitted correctly. Some models also require a closed lid or a properly seated carafe.
Check the control label
A button marked On/Off may start and stop brewing, while a button marked Auto On may control a scheduled cycle.
Watch the indicator
Look for a light or display change after pressing the button.
How to Set the Clock and Start Automatic Brewing
A programmable Cuisinart coffee maker can prepare coffee at a selected time. This is useful when you want a fresh pot ready before breakfast or before leaving for work.
Automatic brewing is different from starting the machine immediately. The clock tells the coffee maker the current time, while the Auto On or Program feature tells it when to begin a future brewing cycle.
You do not always need to program the clock to make coffee right away. If you only want a normal pot, use the immediate Brew function.
Source: perfectcoffeemakers.com
Step 1: Set the current time
Use the Clock, Hour, and Minute controls or the function knob, depending on your model.
Step 2: Choose the future start time
Enter the hour and minute when you want brewing to begin.
Step 3: Confirm the setting
Press the required Program or Set control if your model needs confirmation.
Step 4: Prepare the machine
Fill the reservoir, add ground coffee, install the filter, and position the carafe.
Step 5: Activate Auto On
Press the Auto On or Program control to activate the scheduled brewing feature.
How to Check Whether Auto On Is Activated
Look at the display after programming the machine. Many models show an Auto On indicator, a program symbol, or an illuminated button when the schedule is active.
If the time appears on the screen but the Auto On indicator is not active, the machine may have stored the time without enabling the scheduled cycle. Follow the manual to activate it.
Check that the water tank contains enough water and that the filter basket has coffee ready. A correct timer setting cannot make coffee if the machine is not prepared.
Check the clock
Make sure the displayed time and AM or PM setting are correct.
Check the scheduled time
Confirm that the desired start time is stored.
Check the Auto On light
Make sure the automatic start function is active.
Why Your Coffee Maker May Not Start at the Programmed Time
A common mistake is setting the program time but forgetting to activate Auto On. Another possibility is an incorrect clock setting, especially when the AM and PM indicators are easy to overlook.
A power interruption can also affect the clock or stored settings on some models. Check the display after an outage and reset the time if necessary.
If the machine still does not start, review the programming steps in the manual. The exact order of pressing buttons varies across Cuisinart product lines.
Incorrect clock
Reset the current time before changing the scheduled start time.
Auto On not active
Activate the schedule after setting the time.
Empty reservoir
Add enough water for the selected batch before leaving the machine programmed.
How Much Coffee and Water Should You Use?
The amount of coffee and water you use affects the taste and strength of your brew. Too little coffee can produce a weak drink, while too much may create a strong or bitter taste.
A practical starting point for standard drip brewing is about one level tablespoon of ground coffee per marked cup of water. Adjust the amount to suit your taste and the recommendations in your machine’s manual.
Remember that a coffee maker’s cup markings may not represent an eight-ounce US measuring cup. Check the carafe markings instead of assuming that a 12-cup machine holds twelve standard eight-ounce cups.
For a small batch
Use the water and coffee amounts marked for the desired number of cups. Select the 1–4 cup setting if your model has one and the manual recommends it.
For a medium batch
Measure the water using the carafe markings and add coffee in proportion to the amount of water.
For a full pot
Do not exceed the maximum reservoir or filter basket capacity.
A Simple Coffee-to-Water Starting Guide
The following table gives a basic starting point using one level tablespoon of ground coffee for each marked cup. It is an example, not a fixed Cuisinart requirement.
Coffee strength depends on the beans, grind, roast, water, and brewing system. Adjust the amount gradually until you find a taste you enjoy.
2 marked cups
Start with about 2 level tablespoons of ground coffee.
4 marked cups
Start with about 4 level tablespoons of ground coffee.
6 marked cups
Start with about 6 level tablespoons of ground coffee.
8 marked cups
Start with about 8 level tablespoons of ground coffee.
10 marked cups
Start with about 10 level tablespoons of ground coffee.
12 marked cups
Start with about 12 level tablespoons of ground coffee, provided the machine’s capacity allows it.
Choose the Right Coffee Grind
A medium grind is a useful choice for many automatic drip coffee makers. Very fine grounds can slow water flow and may cause the filter basket to overflow.
If your coffee tastes weak, first check the coffee-to-water ratio. If it tastes bitter, try using slightly less coffee or a different grind. Avoid changing several things at once because it becomes harder to identify the cause.
Medium grind
A practical starting choice for standard drip coffee makers.
Very fine grind
May slow water flow and increase the chance of overflowing.
Very coarse grind
May produce a weaker cup if the water does not extract enough flavor.
Why Your Cuisinart Coffee Maker Will Not Start
If your Cuisinart coffee maker does not start after pressing the button, begin with simple checks. A loose power connection, an incorrectly positioned carafe, an empty reservoir, or a control set to the wrong mode may prevent normal operation.
Do not open the machine or attempt to repair its internal electrical parts. Work through the basic checks first, and stop using the appliance if you notice damaged wiring, a burning smell, smoke, or unusual electrical sounds.
Source: cuisinartkitchen.pro
Check the power connection
Make sure the plug is fully inserted into a suitable working outlet.
Check the water reservoir
Confirm that the tank contains enough water and is properly fitted if it is removable.
Check the carafe
Make sure the carafe is correctly positioned beneath the filter basket.
Check the filter basket
Confirm that it is seated properly and that the lid can close.
Check the selected mode
Make sure the machine is set to immediate brewing rather than a delayed-start setting.
The Display Does Not Turn On
A blank display may indicate that the coffee maker is not receiving power. Check the outlet with another suitable appliance if it is safe to do so, and inspect the plug and cord for visible damage.
If the outlet works but the display remains blank, unplug the coffee maker and consult the manual or Cuisinart support. Do not remove the base or open the control panel.
Possible cause: No power
Check the outlet, plug, and household circuit.
Possible cause: Damaged cord
Stop using the machine and arrange qualified service.
Possible cause: Internal fault
Contact Cuisinart or an authorized repair service.
The Brew Button Does Nothing
If the display works but pressing Brew has no effect, check the function setting first. Some programmable Cuisinart models require the function knob to be placed in the correct position before immediate brewing can begin.
Next, check that the carafe and filter basket are properly installed. If the machine still does not respond, consult the model-specific troubleshooting instructions.
Wrong control setting
Select the correct manual Brew setting.
Incorrectly positioned parts
Reposition the carafe and filter basket.
Control problem
Seek manufacturer support if the button remains unresponsive.
The Coffee Maker Turns On but Does Not Brew
A machine that powers on but does not move water may have an empty or incorrectly installed reservoir. Mineral deposits or internal blockages may also affect water flow.
Turn the machine off and allow it to cool before checking removable parts. If the machine is new, confirm that the first-use cleaning cycle was completed correctly.
If the machine is older, inspect the filter basket and reservoir for visible residue. Use the cleaning or descaling method specified in the manual.
Low water level
Fill the reservoir to the desired level.
Reservoir not fitted correctly
Remove and reinstall it if your model has a removable tank.
Mineral buildup
Follow the manufacturer’s descaling instructions.
The Filter Basket Overflows
An overflowing filter basket can happen when coffee grounds block the flow of water. Using a grind that is too fine, adding too much coffee, or placing two filters together can make the problem worse.
Turn off the machine and allow hot parts to cool before cleaning. Remove the used grounds and inspect the filter basket for residue. Use only one compatible paper filter or the approved permanent filter unless your manual says otherwise.
Never open the filter basket during brewing to investigate a blockage. Hot water and coffee can spill and cause burns.
Too much coffee
Reduce the amount of grounds to stay within the basket’s capacity.
Incorrect filter setup
Avoid combining a paper filter with a permanent filter unless the manual permits it.
Fine coffee grounds
Try a medium grind suitable for automatic drip brewing.
Dirty filter basket
Wash the removable basket and clear away trapped grounds.
Common Mistakes to Avoid When Starting Your Coffee Maker
Small setup mistakes can affect how your Cuisinart coffee maker works. Most are easy to prevent if you check the water, filter, carafe, and control panel before pressing the start button.
Pay special attention to the carafe and filter basket. These parts help direct hot water and brewed coffee through the correct path. Incorrect placement can lead to spills or interrupted brewing.
Starting without water
Always check the reservoir before starting a brew cycle. Never operate the machine without the required water.
Using the wrong filter
Check the filter size and type recommended for your model.
Adding too many coffee grounds
Stay within the filter basket’s capacity to reduce the risk of overflow.
Forgetting the carafe
Always position the correct carafe before starting the machine.
Confusing Auto On with Brew
Use the manual Brew control for immediate brewing and Auto On for scheduled brewing.
Ignoring the first-use cleaning cycle
Flush a new coffee maker with water before preparing your first drink.
Opening the machine during brewing
Do not open the filter basket or touch hot internal parts while the machine is operating.
Important Safety Rules
A Cuisinart coffee maker uses electricity and hot water. Safe handling is just as important as correct brewing.
Keep the power cord away from hot surfaces and avoid placing the machine where children can easily reach the carafe or warming plate. Do not leave the appliance running in an enclosed appliance garage.
Never immerse the main unit, plug, or power cord in water. Unplug the machine before cleaning removable parts or performing maintenance.
Prevent burns
Keep hands away from hot water, steam, the filter basket, and warming plate.
Avoid electrical hazards
Never use the machine with a damaged cord, plug, or housing.
Use the correct carafe
Do not use a cracked glass carafe or place the coffee maker’s glass carafe directly on a stovetop.
Get professional help
Do not attempt internal electrical repairs. Contact an authorized service provider.
How to Keep Your Cuisinart Coffee Maker Ready for Daily Use
Regular cleaning helps your coffee maker brew properly and keeps old coffee residue from affecting the taste of a fresh pot. A few simple habits after each use can make future brewing easier.
Wash the carafe and filter basket after brewing, empty used grounds, and wipe away spills. Follow the manual for cleaning the reservoir, charcoal filter, and internal brewing system.
Mineral deposits can build up when water passes through the machine repeatedly. If your coffee maker has a Clean indicator, follow its instructions when the light appears.
After every brew
Remove used coffee grounds and wash the carafe and filter basket with warm, soapy water.
Regularly
Wipe the exterior with a damp cloth and check for coffee spills or trapped grounds.
When the Clean light appears
Run the cleaning cycle using the solution and steps approved for your model.
When the water filter needs replacement
Replace the charcoal filter according to the manufacturer’s stated schedule.
How to Clean the Machine After Brewing
First, switch off and unplug the coffee maker. Allow the hot parts to cool before removing the filter basket or washing the carafe.
Discard the used coffee grounds and wash the removable parts with mild dish soap. Rinse them thoroughly and let them dry before putting them back.
Wipe the exterior and warming plate with a suitable damp cloth. Avoid abrasive pads and harsh cleaners that could damage the surface.
Clean the carafe
Wash away coffee oils and stains with warm water and mild dish soap.
Clean the filter basket
Remove trapped grounds and rinse the basket thoroughly.
Wipe the exterior
Use a soft damp cloth and keep water away from electrical openings.
When to Descale Your Cuisinart Coffee Maker
Descaling removes mineral deposits that collect inside the machine over time. Hard water can cause these deposits to form more quickly.
Signs that cleaning may be needed include slower brewing, unusual water flow, and a Clean indicator light. These signs do not always mean the same thing, so check the machine’s instructions before choosing a cleaning method.
Some Cuisinart models have a dedicated Clean function. Others require a specific manual cleaning procedure. Use the cleaning solution and water ratio stated in the correct instruction booklet.
After descaling, complete any fresh-water rinse cycles required by the manual. Do not use vinegar or another cleaning product in a way that conflicts with the manufacturer’s instructions.
Check the Clean indicator
Use the light as a maintenance reminder if your model has one.
Follow the correct cleaning method
Different Cuisinart models may have different descaling procedures.
Rinse after cleaning
Run the required fresh-water cycles before making another pot of coffee.
Questions to Check Before and After Your First Brew
After setting up a coffee maker, readers often need to know whether the machine is ready, whether the clock must be programmed, and what to check if brewing does not begin.
These are practical next-step questions identified from common topics covered in coffee maker manuals and product troubleshooting guides. The answers below focus on the decisions that matter during everyday use.
Does a new Cuisinart need a cleaning cycle?
Yes, several Cuisinart drip coffee maker manuals recommend a water-only initial cleaning cycle. Check the instructions for your exact model.
Do I need to set the clock before making coffee?
Not always. Many machines allow immediate brewing without setting a future start time.
Why does the Brew button not respond?
The machine may be in the wrong mode, lack power, or have a removable part positioned incorrectly.
How do I know when brewing is complete?
Check for the end-of-cycle signal, indicator, or display behavior described in the manual.
Which Details Deserve Special Attention?
The most useful detail to check before troubleshooting is the exact model number. A control sequence that works on one DCC-series machine may not work on a Coffee Center or single-serve model.
The next detail is whether you want to brew now or later. This helps separate the normal Brew function from the programmable Auto On function.
Finally, check whether the machine is new or has been used for some time. A new machine may need its first water-only cycle, while an older machine may need cleaning or descaling.
New machine
Focus on packaging removal, washing, filter preparation, and initial cleaning.
Daily use
Focus on water, coffee, filter placement, carafe position, and the Brew control.
Machine not working
Check power, water flow, removable parts, and the selected control mode before seeking service.
Frequently Asked Questions
Q
How do I turn on my Cuisinart coffee maker for the first time?
Start by removing all packaging and washing the removable parts. Fill the reservoir with fresh water, position the empty filter basket and carafe, and plug in the machine as directed by the manual.
Run a complete water-only cleaning cycle before adding coffee. After that cycle finishes, discard the water and prepare the machine for normal brewing.
Q
Do I need to set the clock before using my Cuisinart coffee maker?
No, many Cuisinart coffee makers allow you to brew coffee immediately without setting the clock. The clock is mainly needed for programmable features such as Auto On.
If you want the machine to start brewing at a future time, set the correct current time and program the desired start time. Follow the instructions for your specific model.
Q
Why is my Cuisinart coffee maker not starting?
The machine may not start because it is unplugged, the outlet has no power, the water reservoir is empty, or the carafe and filter basket are not positioned correctly.
Check the control panel as well. Some models require a function knob to be set to BREW before pressing the start button. If the machine still does not respond, unplug it and consult Cuisinart support.
Q
Which button starts a Cuisinart coffee maker?
The start button may be labeled Brew, On, On/Off, or Brew/Off. The exact name depends on the model.
Some machines also have a function knob. On those models, select the normal Brew setting before pressing the separate start control. Check the control labels and instruction booklet if you are unsure.
Q
Can I use my Cuisinart coffee maker without a charcoal water filter?
Some Cuisinart models can operate without a charcoal water filter, while others have model-specific instructions for filter installation. Check the manual to confirm whether the filter is required or optional.
If the machine allows operation without it, use clean drinking water and maintain the coffee maker according to the manufacturer’s cleaning schedule.
Q
How long does a Cuisinart coffee maker take to brew?
Brewing time depends on the model, batch size, water temperature, and selected settings. A small batch may take less time than a full carafe.
If your coffee maker takes much longer than it normally does, check for mineral buildup, a clogged filter basket, or an incorrect coffee grind. Use the manual’s cleaning instructions if needed.
Q
Can I start my Cuisinart coffee maker without adding coffee?
Yes. In fact, a water-only cycle is commonly recommended before using a new Cuisinart drip coffee maker for the first time.
You can also run a water-only cycle when the machine needs a fresh-water rinse after an approved cleaning procedure. Do not add coffee grounds during these cleaning cycles.
Q
Why does my Cuisinart coffee maker beep five times?
Some Cuisinart models use five beeps to signal that a brewing or cleaning cycle has finished. This is a normal feature on certain models.
The exact meaning of the sound depends on the machine. Check the instruction booklet to confirm what its beeps indicate.
Q
Can I leave water in my Cuisinart coffee maker overnight?
Many drip coffee makers allow water to remain in the reservoir between uses, but fresh water is preferable for each new pot. Emptying and drying the reservoir when the machine will not be used for an extended period can also help keep it clean.
Follow the care instructions for your model, especially if it has a removable water tank.
Q
What should I do if my Cuisinart coffee maker starts but no coffee comes out?
First, check whether the reservoir contains enough water and whether the filter basket is correctly installed. A blockage caused by fine grounds or mineral deposits may also affect water flow.
Turn off the machine and let it cool before inspecting removable parts. Clean the filter basket and use the approved descaling process if needed. If water still does not flow, contact an authorized service provider.
✦ Wrapping Up
Conclusion
Starting a Cuisinart coffee maker is simple once you understand its basic controls. Fill the reservoir with fresh water, prepare the filter basket, add ground coffee, position the carafe, and press the correct Brew or On button.
If your coffee maker is new, remember to run its initial water-only cleaning cycle before making your first drink. This helps flush the brewing system and prepares the machine for normal use.
For programmable models, setting the clock and activating Auto On are separate tasks from starting an immediate brew. If the machine does not respond, check the power connection, reservoir, carafe, filter basket, and selected mode before seeking help.
Most importantly, use the instruction booklet for your exact Cuisinart model. Following the correct setup and cleaning steps will help you avoid common problems and make your daily coffee routine easier.
💡 Key Takeaway
Before your next brew, check the water level, install the correct filter, add your preferred amount of coffee, position the carafe, and press Brew. If this is your first use, run a water-only cleaning cycle first.