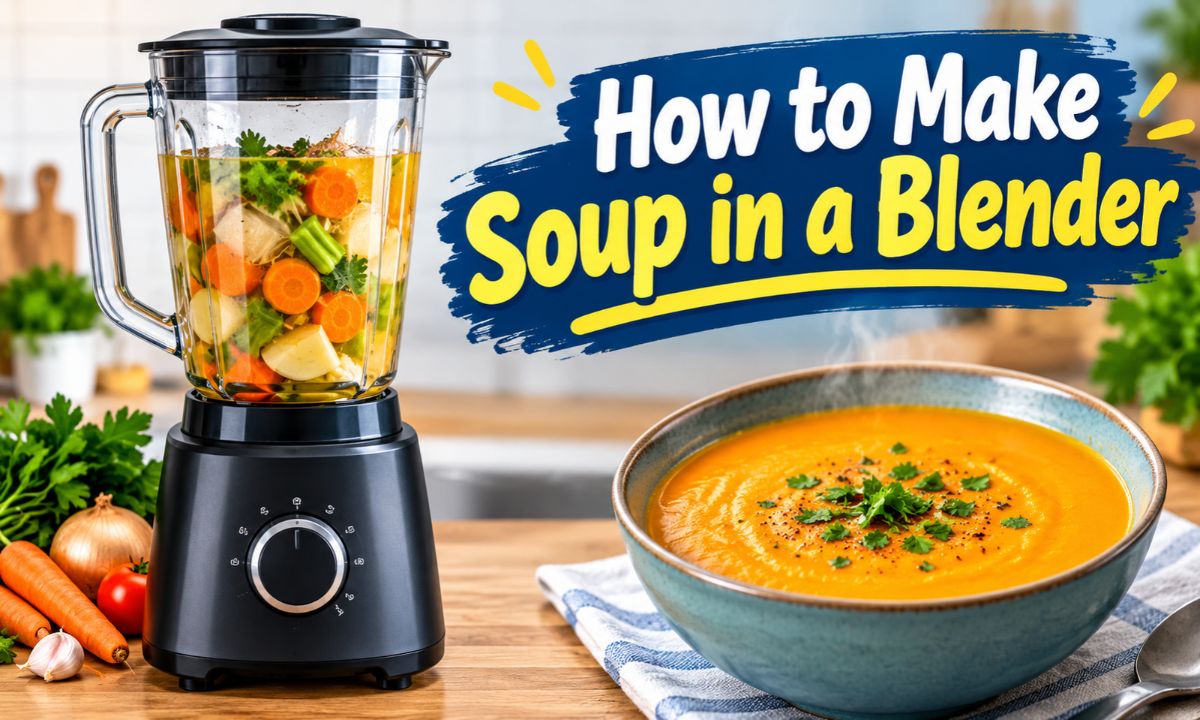
You can make smooth soup in a blender by cooking the ingredients first, adding warm broth, blending in small batches, and adjusting the texture to your liking.
In American kitchens, homemade soup is a handy way to use fresh vegetables, leftover roast chicken, canned beans, and pantry staples. A blender can turn these simple foods into a smooth, creamy meal without the need for heavy cream or a special soup machine. You only need a few basic ingredients, a pot, and a blender that can handle the food you plan to prepare.
The most important step is to know whether your blender is designed for hot liquids. A standard countertop blender can create pressure when it holds steaming soup, which may force hot liquid out of the lid. The safer approach is to cook the soup on the stove, let it cool as directed by the blender manufacturer, and blend it in small batches. You can then return the soup to the pot and heat it to your preferred serving temperature.
This guide explains how to prepare ingredients, blend hot or cold soup, choose the right liquid, fix common texture problems, and clean your blender afterward. It also includes a simple vegetable soup recipe that you can adapt to suit your taste.
Yes, a blender can make smooth soup from cooked vegetables, beans, potatoes, and many other ingredients. It breaks the food into small pieces and mixes those pieces with liquid until the soup reaches the texture you want. Depending on the ingredients and the blender, the result can range from lightly textured to silky smooth.
However, a blender does not automatically cook every ingredient it processes. Some specialized countertop blenders have a heating function, but a standard blender mainly mixes and breaks down food. For most home recipes, you should cook the ingredients in a pot first, blend them, and heat the finished soup if needed.
Blending can also help create a creamy texture without adding much cream. Cooked potatoes, white beans, cauliflower, and winter squash can thicken soup when blended with broth. This gives you more control over the flavor and richness of the finished dish.
Countertop blender
Useful for making smooth batches of vegetable soup, bean soup, and pureed tomato soup. Check the manual before blending warm or hot ingredients.
Immersion blender
Lets you blend soup directly in a suitable cooking pot. It reduces the need to transfer hot liquid, but you must keep the blade submerged and follow the manufacturer’s safety instructions.
Heating blender
Some models can heat ingredients while blending. Follow the specific model’s instructions for ingredient limits, cooking time, and maximum fill level.
Blending and Cooking Are Different Tasks
A blender changes the texture of food, while cooking softens ingredients and makes them ready to eat. For example, raw carrots are firm and difficult to puree into a smooth soup. Simmering them in broth first makes them tender and easier to blend.
The same idea applies to potatoes, squash, onions, and many other vegetables. Cook them until tender, then blend them with enough liquid to keep the mixture moving. Ingredients that need thorough cooking, including raw meat, must be cooked properly before blending.
For a smooth result
Cook firm vegetables until a fork passes through them easily before blending.
For better flavor
Saute onions, garlic, and suitable seasonings before adding broth. This can give the finished soup more depth.
What You Need Before Making Blender Soup
Gather your ingredients and tools before you start. Having everything ready makes the process easier and helps you avoid handling a hot pot while searching for a lid or measuring cup.
For a basic vegetable soup, choose two or three vegetables, a suitable cooking liquid, a little oil, and seasonings. You can use fresh or frozen vegetables. Frozen vegetables are often convenient because they are already cleaned and cut, although cooking times may vary.
You will also need a pot, a spoon, a cutting board, and a blender that is suitable for the ingredients and temperatures involved. A heat-resistant blender jar is not automatically safe for steaming liquids, so check the manufacturer’s instructions rather than relying on the material alone.
Vegetables
Carrots, potatoes, cauliflower, broccoli, tomatoes, onions, and squash are useful choices. Use enough variety to build the flavor and texture you prefer.
Cooking liquid
Vegetable broth, chicken broth, or water can form the base. Choose broth when you want a fuller savory flavor.
Seasonings
Salt, black pepper, garlic, thyme, paprika, or other herbs can complement the vegetables. Add strong seasonings in small amounts.
Optional creamy ingredients
Milk, cream, plain yogurt, coconut milk, or cooked white beans can add richness. Check that the ingredient suits the recipe and any dietary needs.
Blender and pot
Use equipment that is clean, undamaged, and suitable for the temperature and volume of soup you plan to process.
How Much Liquid Should You Use?
The amount of liquid depends on the vegetables, their water content, and how thick you want the soup. Start with less broth than you think you need, then add more after blending. It is easier to thin a thick soup than to make a watery soup thick again.
As a practical starting point, use about 2 cups of broth for roughly 4 cups of cooked vegetables. This is a flexible recipe ratio, not a universal rule. Potatoes and squash may produce a thicker puree, while zucchini and tomatoes can release more water.
Thick soup
Begin with less broth and add small amounts until the blender can process the mixture smoothly.
Thin soup
Add broth or water gradually, blending between additions to avoid making the soup too watery.
How to Make Soup in a Blender Step by Step
The easiest method is to cook the ingredients in a pot, blend them using a suitable method, and adjust the seasoning before serving. This approach works for many vegetable soups and lets you control the final texture.
The instructions below describe a general method. Your blender’s manual takes priority whenever it gives different directions about temperature, fill levels, lid position, or blending time.
Step 1: Wash and Cut the Ingredients
Wash fresh vegetables under running water and remove damaged parts. Peel vegetables when needed, then cut them into pieces of a similar size. Smaller pieces tend to cook more evenly and often become tender faster than large chunks.
You do not need perfect knife skills for soup. The main goal is to help the ingredients cook at a similar rate. Keep raw meat and its juices separate from vegetables that are ready to eat, and clean any surfaces or tools that come into contact with raw meat.
Cut firm vegetables small
Carrots and potatoes benefit from smaller pieces because they can take longer to soften.
Prepare aromatics
Chop onions and garlic so they can soften evenly in the pot.
Step 2: Cook the Vegetables Until Tender
Place a little oil in a pot over medium heat. Add onions or other aromatics and cook until softened. Add the remaining vegetables, your chosen broth or water, and seasonings that benefit from cooking.
Bring the liquid to a gentle simmer, then lower the heat. Cook until the vegetables are tender enough to mash easily with a fork. Cooking time varies with the type of vegetable, the size of each piece, and the amount in the pot, so use tenderness rather than a fixed number of minutes as your main guide.
If you are making a tomato soup, you can cook the tomatoes with onion and garlic until they soften. For a potato soup, simmer the potatoes until tender before blending. Avoid filling the pot so high that it boils over.
Check the texture
Pierce a few pieces with a fork. If they remain hard in the center, continue cooking.
Watch the liquid
Add a little more broth or water if the pot becomes too dry before the vegetables soften.
Step 3: Let the Soup Cool as Required
Before transferring soup to a countertop blender, check the manual for its hot-liquid instructions. Some blenders are designed for warm or hot ingredients, while others require the contents to cool first. Do not assume that a standard plastic or glass jar can safely handle boiling soup.
Hot soup can release steam. In a closed blender, steam can build pressure and push the lid off, sending hot liquid toward your hands and face. Even a small amount of splashing can cause burns.
If your blender does not support hot liquids, allow the soup to cool to the temperature stated in its instructions. Keep the pot in a safe place while it cools, and do not leave cooked food at room temperature for an extended period.
Read the manual
Check the allowed temperature, maximum fill line, and instructions for the lid before blending.
Avoid sealed hot blending
Never run a blender with steaming soup in a fully sealed container unless the appliance is specifically designed for that use and its instructions direct you to do so.
Step 4: Transfer the Soup in Small Batches
Use a ladle to transfer the soup into the blender jar, including some of the cooking liquid. Leave enough room for the mixture to move and expand as it blends. Follow the maximum fill line and any lower limit specified for hot ingredients.
Do not pour a full pot into the blender at once. Smaller batches are easier to control, and they reduce the chance of overflow. If the soup is too thick to move around the blades, add a little more liquid before continuing.
If you use an immersion blender, place the blade head into the soup before switching it on. Keep the blade submerged during blending to reduce splashes. Use a suitable pot and follow the immersion blender’s instructions.
Use a stable surface
Set a countertop blender on a flat, dry surface before operating it.
Secure the lid correctly
Use the lid and vent arrangement required by the manufacturer. Keep hands away from the opening while the motor is running.
Step 5: Blend Until Smooth
Start at a low speed if your blender’s instructions allow it, then increase the speed as needed. Blend until the vegetables break down and the soup looks even. The exact time depends on the ingredients, batch size, and blender.
Stop the motor before removing the lid or checking the mixture. If chunks remain, use a suitable utensil to move them toward the liquid, then secure the lid again before restarting. Never insert a spoon or spatula into a running blender.
For a soup with some texture, blend only part of the batch or stop when small pieces remain. For a very smooth result, cook the vegetables until fully tender and blend them in manageable batches.
Too thick to blend
Stop the blender and add a small amount of broth or water, provided the liquid temperature is safe for your appliance.
Uneven texture
Check that the vegetables are tender and that the jar is not overfilled.
Step 6: Adjust the Texture and Flavor
Once the soup is blended, taste it and decide whether it needs more salt, pepper, herbs, or liquid. Add seasonings in small amounts because a little can go a long way, especially in a small batch.
If you want a richer soup, stir in a suitable amount of milk, cream, coconut milk, or another ingredient that fits your recipe. Add dairy gently and avoid vigorous boiling after adding it, since some dairy mixtures can curdle under high heat.
If the soup is too thin, return it to the pot and simmer it gently, uncovered, if the ingredients allow. Stir often so the bottom does not scorch. You can also blend in a little more cooked potato, squash, or beans to add body.
For more flavor
Try black pepper, fresh herbs, a small amount of lemon juice, or a little extra broth with a stronger flavor.
For a smoother finish
Blend again in a suitable batch or pass the soup through a fine-mesh strainer if the recipe calls for an especially smooth texture.
Step 7: Reheat and Serve
Pour the blended soup into a clean pot and warm it over medium-low heat, stirring often. Heat until it is hot throughout and reaches a safe serving temperature for the ingredients used. If the soup contains meat or poultry, follow appropriate food-safety guidance for the finished dish.
Avoid splashing the soup while stirring, especially if it has become thick. Taste once more before serving and add any final herbs or toppings. A little black pepper, chopped parsley, toasted bread, or a spoonful of plain yogurt can complement many vegetable soups.
Serve the soup in warm bowls if desired, but do not overheat it merely to keep it hot. Let it cool to a comfortable eating temperature before serving it to children or anyone who may be sensitive to hot food.
Check consistency
The soup should pour at the rate you prefer without being watery or so thick that it sticks to the spoon.
Add toppings last
Keep crunchy toppings separate until serving so they retain their texture.
Easy Blender Vegetable Soup Recipe
This basic vegetable soup is a useful starting point because it uses common ingredients and does not require cream. The cooked vegetables provide the body, while the broth adds flavor and helps the blender create a smooth mixture.
The quantities below make about four modest servings, depending on the final thickness and serving size. Treat the recipe as a starting point rather than a strict formula. You can change the vegetables or seasonings to match what you have at home.
Ingredients
Gather the following ingredients before cooking. Use vegetable broth for a vegetarian version, or chicken broth if it suits your preferences.
2 medium carrots
Peeled and cut into small pieces.
2 medium potatoes
Peeled if desired and cut into small cubes.
1 small onion
Peeled and chopped.
2 cloves garlic
Peeled and chopped or crushed.
4 cups broth
Use vegetable or chicken broth, adding more later if needed.
1 tablespoon olive oil
For softening the onion and garlic.
Salt and black pepper
Add to taste, keeping in mind that broth may already contain salt.
Optional herbs
Thyme, parsley, or another herb that works with the vegetables.
Method
Heat the olive oil in a pot over medium heat. Add the onion and cook until soft, then stir in the garlic for a short time. Add the carrots, potatoes, broth, and any herbs that benefit from simmering.
Bring the mixture to a gentle simmer. Cook until the carrots and potatoes are tender when pierced with a fork. Add a little more broth or water if needed, but avoid making the mixture too thin before blending.
Allow the soup to cool to the temperature required by your blender. Transfer a small batch to the jar, keeping below the specified fill line. Blend until smooth, then repeat with the remaining soup. If using an immersion blender, blend in the pot only if the appliance instructions permit it and you can keep the blade safely submerged.
Return the blended soup to the pot. Warm it gently, taste it, and add salt, pepper, or herbs as needed. If the texture is too thick, stir in more broth. If it is too thin, simmer it uncovered for a short time while stirring.
Preparation time
Allow time to wash and cut the vegetables, with additional time for cooking, cooling as needed, blending, and reheating. The total time varies with your equipment and ingredient size.
Texture
Potatoes help make this soup thick and filling. Add broth gradually if you prefer a lighter consistency.
Serving idea
Serve with whole-grain bread, crackers, or a simple sandwich for an easy lunch or dinner.
Which Ingredients Make the Best Blender Soup?
Many vegetables work well in blended soup, but each brings a different texture and flavor. Choosing ingredients based on their cooking time and water content makes it easier to get the result you want.
Starchy vegetables tend to create a thick, filling soup. Vegetables with more water, such as zucchini and tomatoes, often produce a lighter puree. Combining different types can balance thickness and flavor without requiring much cream.
Potatoes, Squash, and Carrots
Potatoes can make soup thick because their cooked starch helps give the blended mixture body. Blend them with enough liquid to keep the texture smooth, and avoid excessive blending if the soup becomes gluey. The type of potato and how it is handled can affect the result.
Winter squash and carrots add a naturally sweet flavor and can create a thick puree when cooked until tender. They pair well with onion, garlic, black pepper, and herbs such as thyme.
Best use
Choose potatoes for hearty soups, squash for a rich puree, and carrots for a gently sweet vegetable soup.
Tomatoes and Peppers
Tomatoes make a flavorful soup with a lighter texture than a potato-based puree. Cooking them with onion and garlic can soften their sharpness. If tomato skins or seeds bother you, strain the finished soup after blending.
Bell peppers can add sweetness and color. Cook them until soft before blending, and combine them with tomatoes, carrots, or broth to create a balanced flavor.
Best use
Use tomatoes for a familiar tomato soup and cooked bell peppers for a sweet, savory vegetable puree.
Beans, Lentils, and Other Protein Sources
Cooked beans and lentils can make soup more filling and help thicken it. Canned beans are convenient, but drain and rinse them when appropriate for the recipe. Add them to the pot and warm them through before blending.
Cooked chicken can also be blended into certain soups, although the texture may become dense or grainy if you blend it too much. For a soup with both a smooth base and distinct pieces of chicken, blend the vegetables first and stir in chopped cooked chicken afterward.
Best use
Blend beans or lentils into the base when you want a thicker soup. Keep meat in small pieces when you prefer more texture.
How to Fix Common Blender Soup Problems
Most blender soup problems come from the ingredient texture, the amount of liquid, or the way the blender is loaded. Make one adjustment at a time so you can see what changes the result.
Before checking the jar or changing the mixture, switch off the blender and wait until the blades stop. Unplug the appliance before using a utensil to move ingredients or clear food around the blades.
Why Is My Soup Too Thick?
A thick soup may contain too much potato, squash, beans, or other ingredients that absorb liquid. The blender may also struggle when there is not enough fluid to help the ingredients circulate.
Add broth or water a little at a time, then blend again if the temperature is safe for your appliance. If the soup is already smooth, you can stir in extra liquid in the pot instead.
First fix
Add a small amount of liquid and check the consistency before adding more.
Why Is My Soup Too Watery?
Soup can become watery when the ingredients release a lot of moisture or when too much broth is added. This does not mean the soup has failed. You can often correct the texture without changing the flavor very much.
Simmer the soup gently in an uncovered pot to reduce excess liquid. Stir it often and watch for splashes. Another option is to blend in a little more cooked potato, beans, or another suitable thick ingredient.
First fix
Simmer gently to reduce the liquid or add a small amount of cooked, thickening food.
Why Does My Soup Have Lumps?
Lumps often mean that some vegetables are still firm or that the blender jar was too full. They may also form when there is too little liquid for the blades to move the ingredients well.
Check the texture after turning the blender off. If the vegetables are firm, return them to the pot and cook them until tender. If they are soft, blend a smaller batch with a little more liquid.
First fix
Cook firm vegetables longer, reduce the batch size, or add a little liquid before blending again.
Why Does My Soup Taste Bland?
A smooth soup can taste mild when it lacks salt, acid, herbs, or a strong base. Blending spreads the flavor through the whole mixture, so the seasoning may need adjustment after the vegetables are cooked.
Taste the soup before adding more salt, especially if you used prepared broth. A small amount of lemon juice or another suitable acidic ingredient can brighten the flavor. Herbs, black pepper, sauteed onion, or roasted vegetables may also help.
First fix
Adjust seasoning gradually, tasting after each change instead of adding a large amount at once.
Why Is My Soup Foamy?
Blending can introduce air into soup, creating a layer of foam on top. This can happen when the blender runs at high speed or when the ingredients naturally trap air.
Let the soup sit briefly after blending, then stir gently. If the recipe permits, warming it slowly in a pot can help some of the foam settle. Avoid filling the blender beyond its limit in an attempt to reduce the foam.
First fix
Let the soup rest briefly and stir gently before serving.
Hot Soup Safety and Blender Care
Hot liquid needs extra care because steam and pressure can force soup out of a blender. Burns can happen quickly, so follow the appliance instructions at every stage. If you are unsure whether your model can handle hot soup, let the mixture cool before blending.
Never put your face over the blender jar when opening it, and do not remove the lid while the blades are moving. If hot soup spills, avoid trying to catch or grab the container while the motor is running. Switch the appliance off first and allow moving parts to stop.
Important Safety Rules
Safe blending starts before you turn on the motor. Check the jar, lid, seal, and base for damage, and place the appliance on a dry, stable surface. Do not use a jar with cracks or a lid that does not fit properly.
Follow the temperature limit
Use hot ingredients only when the manufacturer specifically permits them and follow the stated temperature and fill restrictions.
Avoid overfilling
Leave enough room for movement and expansion. Follow the maximum fill line for the ingredients you are blending.
Keep the lid secure
Use the required lid and vent setup. Never hold a loose lid in place over a sealed container of steaming soup as a substitute for the correct instructions.
Keep hands clear
Switch off and unplug the blender before scraping food from the jar or touching the blades.
Use care around children
Keep hot pots, cords, and running blenders out of reach, and supervise children around kitchen equipment.
How to Clean the Blender After Making Soup
Clean the blender soon after use so that starch, oil, and dried food do not cling to the jar. First, unplug the appliance and follow the manufacturer’s instructions for removing the jar and blade assembly. Some parts are dishwasher-safe, while others require hand washing.
Wash the jar and lid with warm water and dish soap when the manual allows it. Take care around sharp blades and never place the motor base in water. Wipe the base with a slightly damp cloth and dry it before storing.
If your manual permits a rinse cycle, you may add warm water and a small amount of dish soap to the jar, secure the lid as directed, and run the blender briefly. Empty it, rinse thoroughly, and check for leftover food around the seals. Do not use this method if the manufacturer advises against it.
Clean the lid
Food can collect around lid edges and vents, so wash these areas carefully.
Check the blade area
Remove food residue according to the manual, keeping fingers away from sharp edges.
Dry before storage
Let washable parts dry fully to help prevent lingering odors and moisture.
How to Store and Reheat Homemade Blender Soup
Store leftover soup in clean, shallow containers and refrigerate it promptly. For general food safety, cooked leftovers should be refrigerated within two hours, or within one hour when the surrounding temperature is above 90 degrees Fahrenheit. A refrigerator should be kept at 40 degrees Fahrenheit or below.
Many cooked leftovers are best used within three to four days when refrigerated properly. If you cannot use the soup in that time, freeze it in suitable containers, leaving space for expansion. Label the container with the date so you can keep track of how long it has been stored.
Reheat only the portion you plan to eat when practical. Warm soup in a pot over medium heat, stirring often, until it reaches 165 degrees Fahrenheit. If you use a microwave, stir the soup during reheating so that cold spots do not remain, and check the temperature before serving.
Some soups thicken in the refrigerator because the starch absorbs liquid as it cools. Stir in a little broth or water during reheating to restore the texture. Add fresh herbs or a small amount of seasoning at the end if the flavor has become muted.
Can You Freeze Blender Soup?
Yes, many blended vegetable soups freeze well. Let the soup cool safely, then transfer it to freezer-safe containers. Leave some room at the top because liquid expands as it freezes.
Soups made with dairy may separate or develop a grainy texture after freezing and thawing. The soup may still be usable, but its texture can change. If you plan to freeze a creamy soup, consider freezing the base before adding cream or milk, then stirring in the dairy while reheating if the recipe allows.
Freeze in portions
Smaller containers make it easier to thaw only what you need.
Thaw safely
Thaw in the refrigerator or use a safe method suitable for the food, then reheat thoroughly.
Frequently Asked Questions
Q
Can I put hot soup straight into a blender?
Only if your specific blender is designed for hot liquids and its manual permits the temperature and volume you plan to use. Hot soup releases steam, and pressure can build inside a closed jar. If the instructions do not clearly allow hot blending, let the soup cool to the recommended temperature before processing it.
Q
Can I make soup in a blender without cooking the vegetables first?
You can blend ingredients for some cold soups, such as gazpacho, without cooking them. However, firm vegetables such as raw carrots and potatoes are not ideal for a smooth soup unless the recipe and equipment are specifically suited to them. For a typical warm vegetable soup, cook the ingredients until tender before blending.
Q
Do I need a special blender to make soup?
No. A standard blender can puree cooked soup ingredients if the jar, motor, and temperature limits are suitable. You do not need a heating blender because you can cook the ingredients on the stove and warm the blended soup in a pot. An immersion blender is another option for blending directly in a suitable cooking vessel.
Q
How do I make blender soup creamy without cream?
Use ingredients that create a creamy texture when blended, such as potatoes, cooked white beans, cauliflower, or winter squash. Blend them with broth until smooth, then adjust the thickness with small amounts of liquid. This method adds body without relying on heavy cream.
Q
Can I blend soup in a NutriBullet or personal blender?
It depends on the exact model. Personal blenders may have strict temperature and fill limits, and some are not designed for hot ingredients. Check the manufacturer’s manual before using one for soup. If hot blending is not permitted, let the soup cool as directed and blend only within the stated capacity.
Q
How long should I blend soup?
Blend until the ingredients reach the texture you want, following your appliance’s instructions for speed and operating time. Soft cooked vegetables may become smooth quickly, while fibrous ingredients can take longer. Stop the motor before checking the texture, and avoid running the blender longer than the manufacturer permits.
Q
Why does my blender soup taste bitter?
Bitterness can come from overcooked garlic, certain vegetables, strong herbs, or ingredients that have developed an unwanted flavor. Taste the soup before adding more seasoning. A little broth, a suitable creamy ingredient, or a small amount of acid may help balance the flavor, depending on the cause.
✦ Wrapping Up
Conclusion
Making soup in a blender is a simple way to turn cooked vegetables and broth into a smooth, filling meal. Start by preparing the ingredients, cooking them until tender, and choosing a blending method that matches your appliance. Adjust the liquid slowly so you can control the final texture without making the soup too thin.
The main point to remember is that blending does not always mean cooking. A standard blender usually purees the ingredients, while a pot provides the heat needed to cook or reheat the soup. Follow the manufacturer’s instructions for hot liquids, batch size, and cleaning to reduce the risk of burns and equipment damage.
Once you understand the basic method, you can adapt it to tomato soup, carrot soup, potato soup, squash soup, or a mix of vegetables from your refrigerator. Start with the simple vegetable recipe in this guide, taste as you go, and change the ingredients to suit your needs.
💡 Key Takeaway
For your first batch, cook carrots, potatoes, onion, and garlic in broth until tender. Let the mixture cool to the temperature required by your blender, puree it in small batches, and return it to the pot to adjust the flavor and thickness before serving.